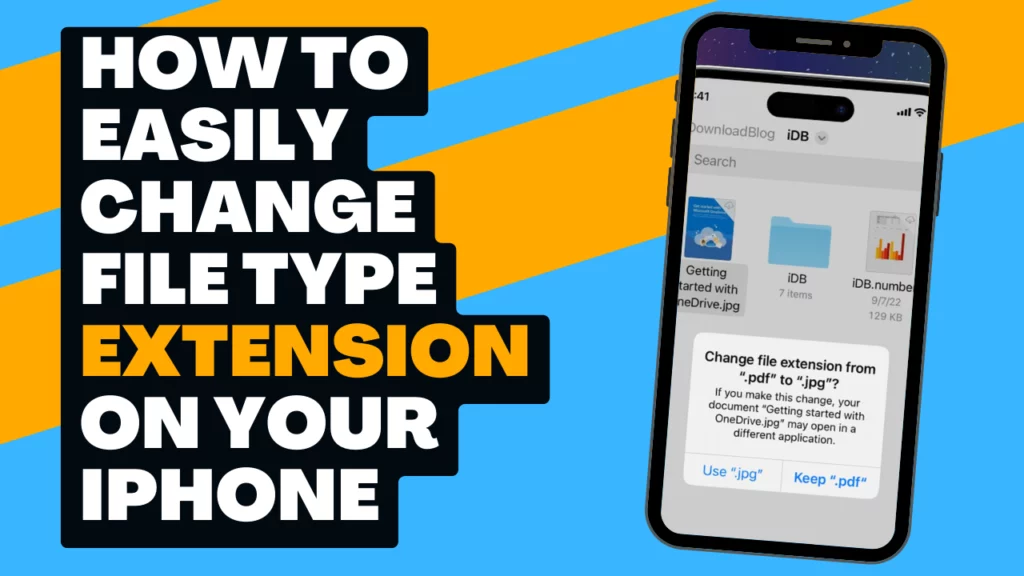
In the digital age, knowing how to manage your files effectively is crucial, especially when you’re on the go. One essential skill is to change file type extension on Your iPhone. This might seem like a task for tech-savvy users only, but with the right guidance, anyone can do it.
Whether you need to convert a photo for an upload, change a document to a PDF, or make any other file type adjustment, this article has got you covered.
Understanding File Extensions
Before diving into the “how,” let’s understand the “what.” File extensions are the short, suffix-like texts at the end of file names (e.g., .jpg, .pdf, .docx) that tell your device what kind of file it is dealing with.
They dictate which apps can open or edit the file, affecting file compatibility across different platforms.
Pre-requisites
To change file extensions on your iPhone, you’ll primarily use the built-in Files app. However, for more complex conversions (like turning a photo into a PDF), you might need a third-party app. We’ll explore both methods, so no initial setup is required other than having your iPhone handy.
Step-by-Step Guide to Change File Extensions
Using the Files App
The Files app is a powerful tool already included on your iPhone. Here’s how to use it to change file extensions:
Step1: Locating the File
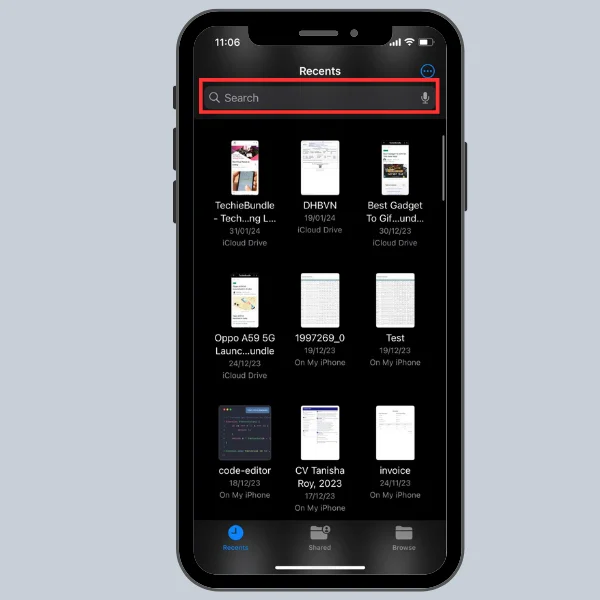
Open the Files app and navigate through your folders to find the file you wish to change. You can use the search feature at the top if you’re having trouble locating it.

Step2: Renaming the File
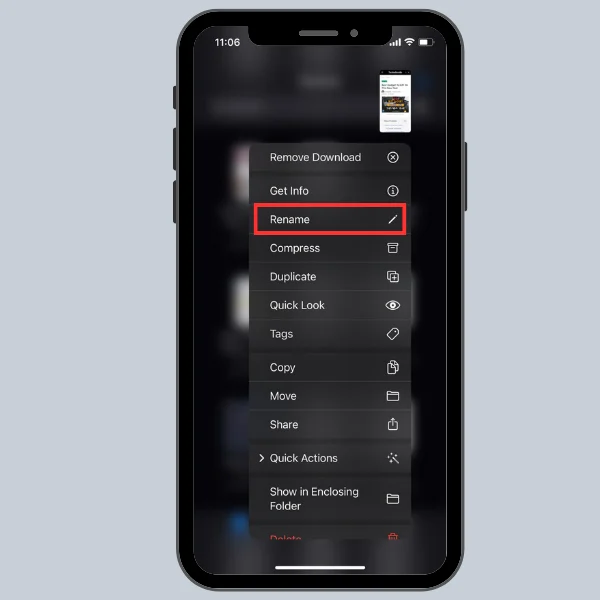
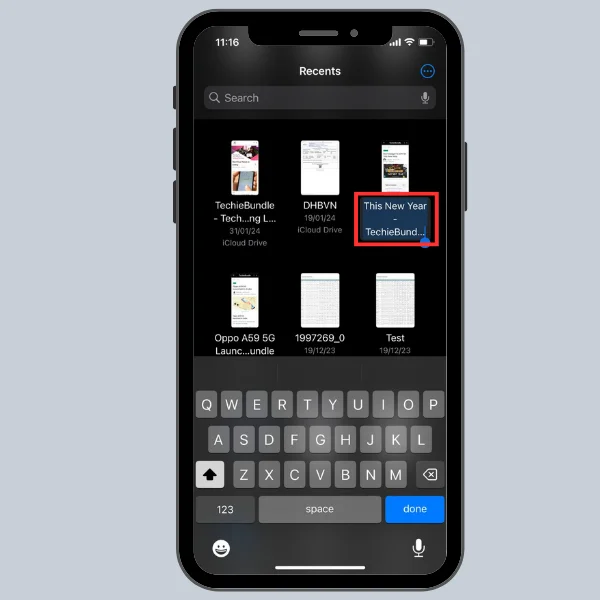
Once you’ve found your file, press and hold on its name until a menu pops up. Select “Rename” from the options. Here, you can edit the file’s name, including its extension.

After changing it to the desired extension, tap “Done.” Be cautious, as changing the extension might make the file unusable if it’s not compatible with the new format.

Using Third-Party Apps
For conversions that aren’t as simple as a rename, a third-party app will be your best friend.
Step1: Choosing the Right App
Look for apps like File Converter, which supports a wide range of file types. Make sure to read reviews and check ratings before downloading to ensure reliability and security.
Step2: Installing and Setting Up the App
Once you’ve chosen an app, download it from the App Store and follow any setup instructions provided by the app.
Step3: Converting File Types
Open the app and import the file you wish to convert. Select the new format you need from the app’s options, then start the conversion. After the process is complete, save the new file to your desired location.
Tips for Successfully Changing File Types
- Backup First: Always have a backup of your original file, just in case something goes wrong during the conversion.
- Compatibility Check: Ensure the new file type is compatible with the software or platform you plan to use it on.
- Test the File: Open the converted file to make sure it works as expected. If it doesn’t, you might need to try a different conversion method or app.
Troubleshooting
If you encounter issues, such as the file not opening or appearing corrupted, double-check the file extension and ensure it matches the file type you intended to convert to. If problems persist, consulting the app’s support documentation or seeking help from online forums can offer solutions.
Conclusion
Changing a file’s type on your iPhone doesn’t have to be daunting. With the Files app for simple renames or third-party apps for more complex conversions, you’re well-equipped to handle most tasks.
Remember, the key to a smooth conversion process is understanding the compatibility and ensuring you have the right tools at your disposal.
Additional Resources
For more in-depth guidance or troubleshooting, Apple’s official support pages and user forums are invaluable resources. Additionally, online communities on social media platforms can offer real-world advice and tips from fellow iPhone users.
By following this guide, you’ll find that changing file types on your iPhone is a simple and useful skill that can save you time and make your digital life a bit easier. See the detailed instructions on using your Android phone as a webcam on Windows 11.
Whether for work, school, or personal projects, mastering this task is a step forward in becoming more tech-savvy and making the most out of your devices.


