For many, screen capturing on Mac can transform everything from creating tutorials to recording presentations, and even capturing funny moments on your screen. It does not matter if you are a content creator, a teacher, or just someone who needs to get something done at work or your personal life, macOS has tools at your disposal to do it effortlessly.
This guide will demonstrate how to screen capture on a mac ranging from taking screenshots, recording screens, and even editing captures after they have been made.
1. Taking Screenshots on Mac
Here is the most common way on how you could capture a screenshot on your Mac, it allows easy screen capturing.
Method 1: Capturing the Whole screen
If you want to capture the entire screen, simply:
Press Command (⌘) + Shift + 3
You will get an automatic screen capture photo saved on your desktop with an audible confirmation camera shutter sound.

Method 2: Take Screenshot of a Selected Area
If you wish to take a screenshot of a specific section of the screen, do the following:
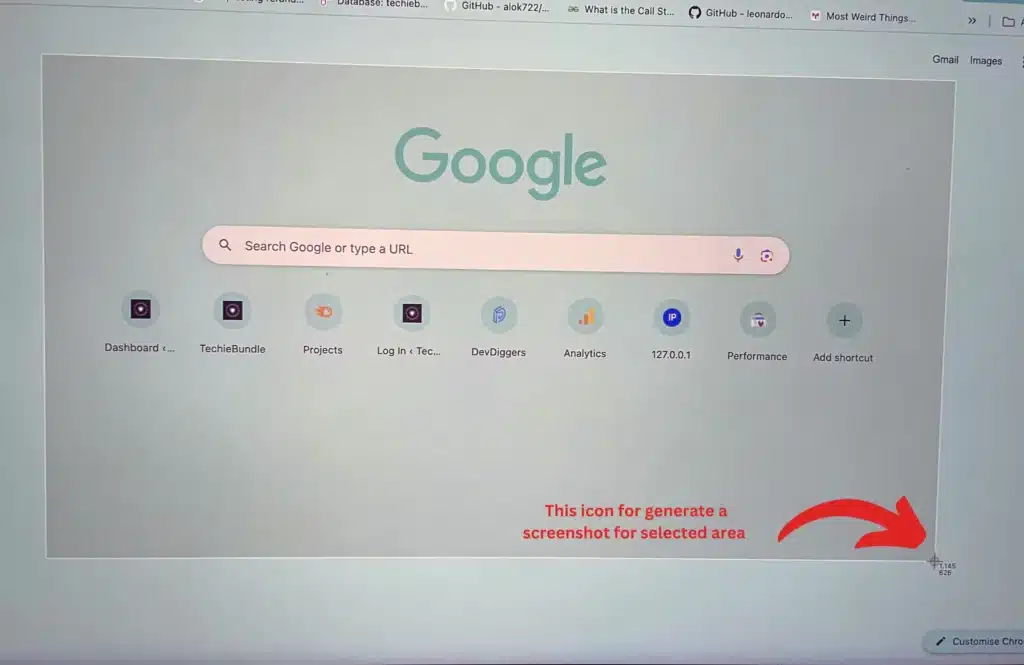
Press Command (⌘) + Shift + 4
After you press this combination, your cursor will become a crosshair. You can click and drag to highlight the section of the screen you would like to take a screenshot of. After releasing the mouse button, the screenshot will be captured.

Method 3: Taking A Screenshot of A Particular Window
If you wish to take a screenshot of a set window, do the following:
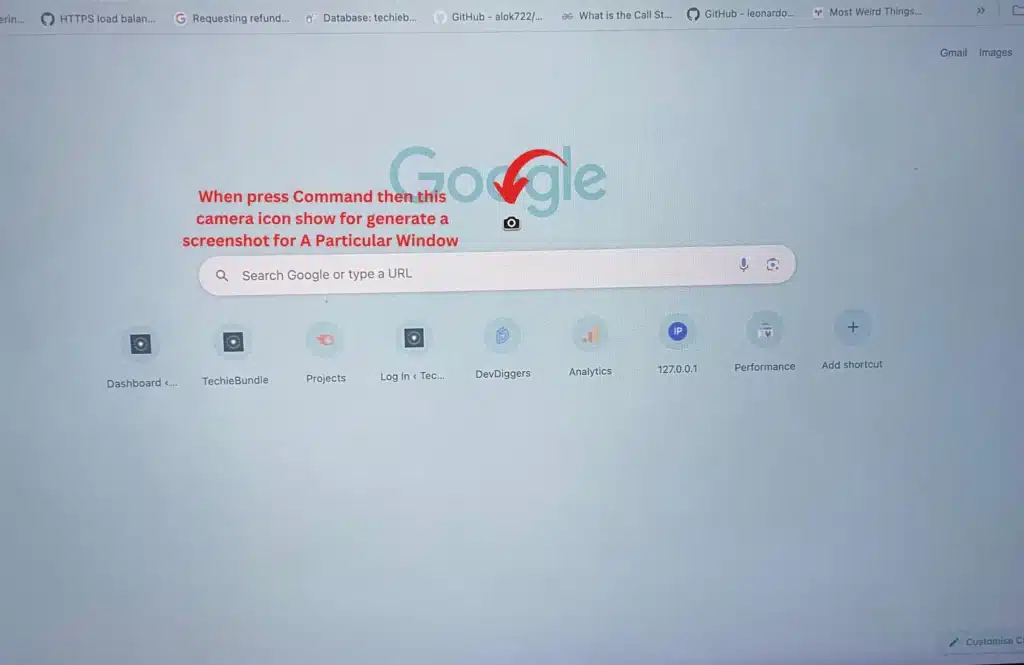
Press Command (⌘) + Shift + 4, then Spacebar
After you press the above commands, your cursor will switch to a camera icon. Click the window you would like to take a screenshot of, and the screenshot will automatically be taken.

Method 4: Capture The Touch Bar screenshot for Macbook Pro’s whose have touchbars
If you want to screenshot to anything that is displayed on the Touch Bar:
Press Command (⌘) + Shift + 6
The screenshot will automatically be saved in your desktop.
2. How To Record Your Screen On A Mac
Along with screenshots, macOS provides the option to record your screen. This is particularly useful for creating guides and demos, recording gameplay, and more.
Method 1: Taking Advantage of Screenshot Toolbar
Starting from macOS Mojave (10.14) and later, new age active screen recording options are available.
Press Command (⌘) + Shift + 5
The toolbar will be located at the bottom of the screen. Choose from one of three options:
- Record Entire Screen: Screenshots everything on your display.
- Record Selected Portion: Record a certain part of the display.
- Capture Screen: Takes a screenshot and does not record anything.
To start recording, click “Record” and also you can set up delay record when click on option button as show in the video. In the end, click the Stop button located in the menu bar on the top of the page. Don’t worry, the recording will be saved automatically.
Method 2: Using QuickTime Player
QuickTime provides an even more sophisticated screen recording tool:
- Launch QuickTime Player from the Applications folder.
- In the menu bar, select File > New Screen Recording.
- To begin recording, click on the red button. You have the ability to record either the complete screen or a chosen area.
- Once finished click the Stop button in the menu bar.
3. Editing Your Captures
Once you’ve taken a screenshot or video recording, you may like to modify it or add some notes. Here are some instruments offered in macOS:
Editing Screenshots
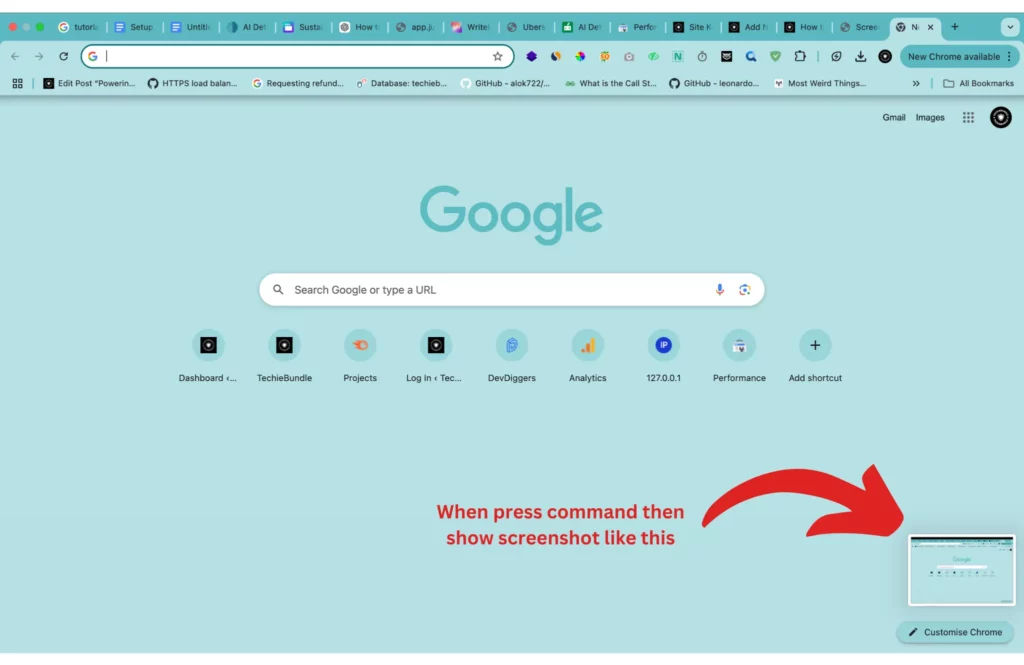
When you take a screenshot, a thumbnail will appear briefly on the bottom right hand corner of your screen. You can tap on the thumbnail and it will open in Markup. This is a tool that allows you to add text and drawings on the screenshot.
Editing Screen Recordings
Editing screen recordings is done with QuickTime Player using its built-in editor.
- Open the screen recording in QuickTime.
- In the menu bar, go to Edit and select what you wish to do with the video, edit, trim, rotate, etc.
You can also do advanced editing using iMovie, or other applications like Final Cut Pro.
4. Where to Find Your Captures
By default all the screenshots, as well as screen recordings, are put into the desktop. Change save m-location if desired:
- Press Command (⌘) + Shift + 5 to open the screenshot toolbar.
- Click Options, and under “Save to“, select your preferred location, such as a folder or iCloud Drive.
5. Third Party Apps For Screen Capture On Mac
- Snagit: Capable of capturing, recording, scrolling windows, and annotating includes features that go even beyond basic screen capturing.
- ScreenFlow: A powerful tool great for professionals that include a screen recording, video editing, and any other video work you’d like done.
- Monosnap: A powerful screen grabber and portable storage tool with simple use and great features for capturing, editing, and adding annotations, even to the cloud.
Conclusion
With the built-in tools of macOS, screen capturing is not a problem with a Mac. The modern day enables you to take a rapid screenshot, and record your screen which makes these tools suitable for normal usage and content development. If you want to go above and beyond, then seek third party applications to enhance your experience even further.
So as you now understand how to capture your screen, go out and make some great content and start sharing!
Also Read: How to Set Up Your New MacBook


